

4 Steps to Digital Organizing

Often we I think of the word “organizing” my mind thinks of spaces in our home. Yet organizing does not only have to do with physical spaces or items, it also is our digital space as well. Now days we are often on our smart phones and may consider organizing our apps and all the things. More on that for another day, but currently I am focused on organizing my digital files. Our family recently purchased a new computer as our 10+ year old PC was on the fritz. This motivated me as I was moving files over to get them cleaned up and organized into a system that would work for me. I want to share this simple process to help jump start other’s digital file overwhelm.
Traditionally I help others organize their digital photos so they can enjoy, easily access them, and have them backed up. Through this process I will collect all photos and videos centralizing them in one place, remove duplicates, sort them into folders, and back them up. The same process can be applied to your digital files as well. This process can work for you whether you use PC or a Mac. Depending on what you want to accomplish, you can apply all or some of these simple steps:
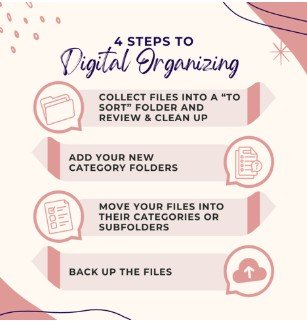
Create a folder on your computer where you will pull all your files you want to organize. You can label this “data dump” or “files to organize.”
Think of categories you want to organize your files into. I recommend high level categories to not overcomplicate this step and simplify the process.
Create folders and subfolders to match the categories or themes you named.
Back these files up and make them accessible through other devices if you wish
Once you have created your “files to organize” folder, you can collect all the files you want to retain and file away. You may only be working from your computer’s files, yet if you do have old CDs, flash drives, or documents saved on other devices you can move the files by copying them over to this folder also.
When setting up your new digital filing system, first write down all the categories you want to use. I suggest high level categories or themes so you can make sure you retain every file you want to keep but not be too overwhelmed with a ton of folders. You can create subcategories under each file as well. I try to keep it to no more than 10 categories.
Some ideas for categories: Personal, Kids, Family, School, Printouts, House, Digital Art, Resources, Addresses or Contacts.
Create your folders for each of the categories and subcategories you came up with and drag the files from your “to organize” folder into each corresponding category file.
This is a good time to tidy up. If you notice saved documents that you do need any more or duplicates, you can delete.
Here are examples of categories I am using:

Once those steps are complete, you can now back up the files! This is an important step to help safeguard your information so that you can easily access if something happens to your device. PC users may opt to use OneDrive and while Mac may use iCloud. Now iCloud is a sync so if anything is deleted from one device, it is deleted from all and the cloud. I usually suggest Dropbox as well as another option.
I had OneDrive before on my PC, so I personally may choose Dropbox once I move all my files over to my Mac. Dropbox allows you to also access the files across all devices. Dropbox has a smart feature for “sync” so it doesn’t actually take a ton of space on your computer. So you can view all files without taking up space, but then once you want to use the file, you download the full size to your computer to work from it.
Now once all is done, its time to keep the digital file system maintained. Some tips to help keep it up is to set aside time on your schedule whether it is monthly, quarterly, annually to review and back it up. For managing day to day new documents, I suggest you get into the habit of filing it right away. Review your items decide if you want to retain the document and move it into the folders at that time. If you are checking your emails and there is a document you want to save, right then download it and save it in the correct file category. Life happens and things change so during your maintenance it may be a good idea to check your categories and see if you need to make any adjustments. It is easy to drag and drop files into their new home.
I hope this helps simplify the idea of organizing your digital files! Happy filing ☺
